
and be the first to learn about all promotions and offers!
- 5 Akhad Ha'am St., Netanya, Israel

- Phone: +97298821001
- Sunday - Thursday: 11:00 - 24:00
Friday: 11:00 - 16:00
Saturday and holiday: 20:00 - 24:00 - Contact us form
+972 9-882-1001
Sunday - Thursday: 11:00 - 24:00
Friday: 11:00 - 16:00
Saturday and holiday eve: 20:00 - 24:00
Email info@topmarket.co.il
Address
How to Clean a Mechanical Keyboard Without Risking the Switches
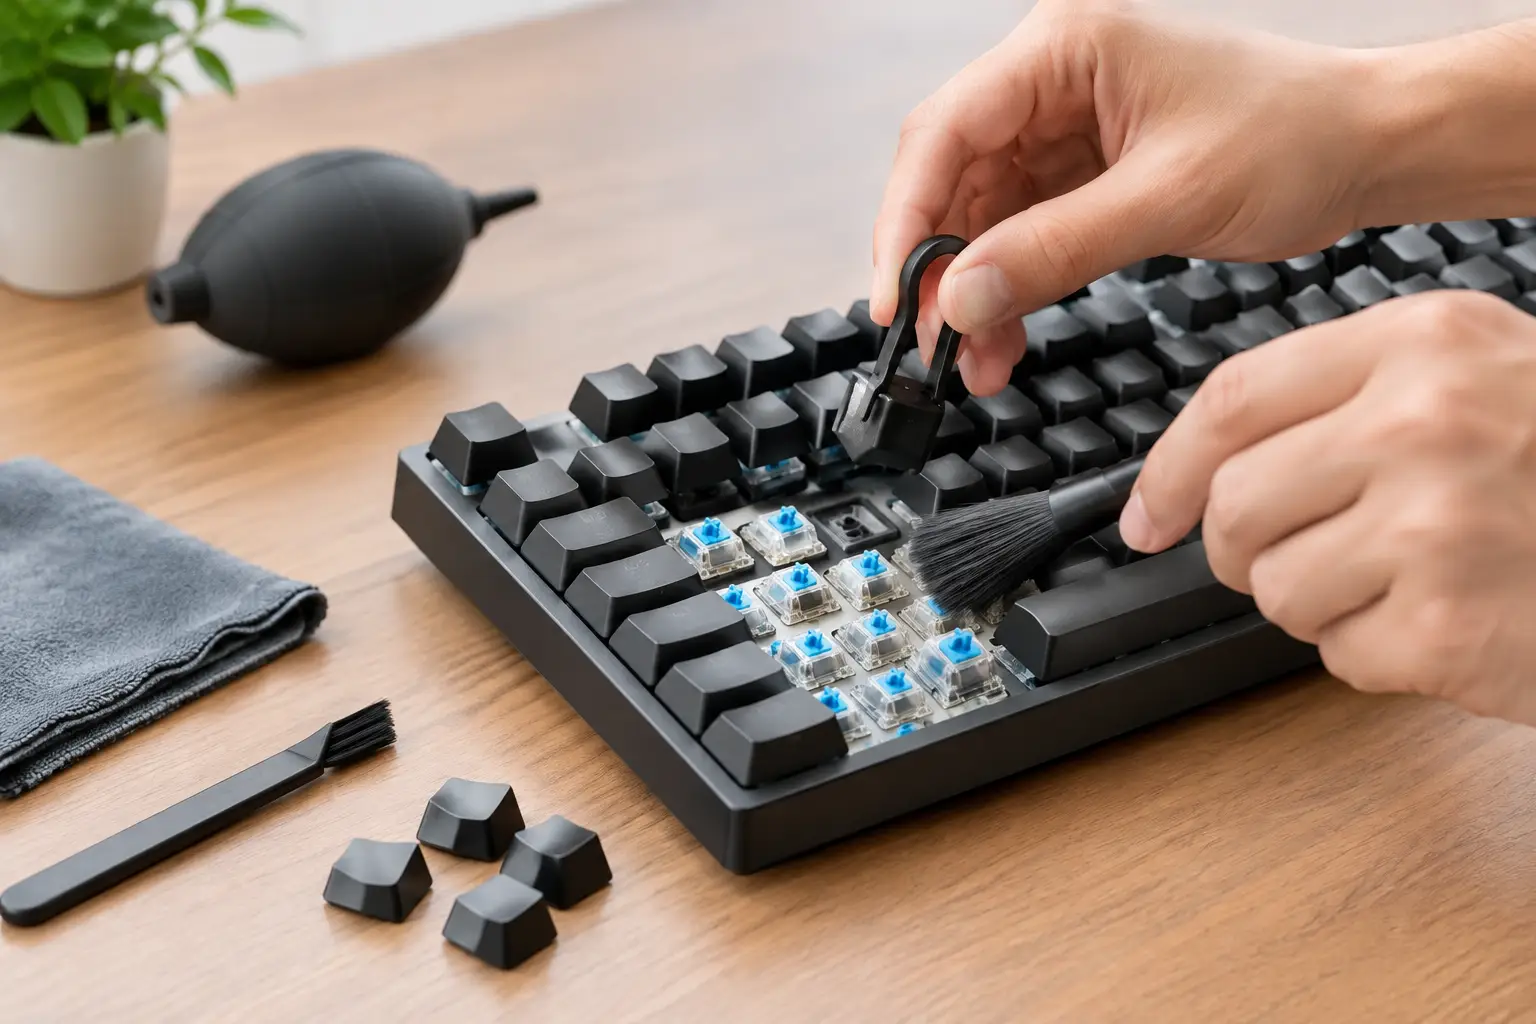
A small crumb under the spacebar, dust around the lighting switches, or a coffee stain near the arrow keys can quickly change the typing experience. Those looking for how to clean a mechanical keyboard don't need to dismantle all the equipment immediately: in most cases, a step-by-step approach with the right tools will restore the keyboard's clean appearance and precise performance, without risking switches, RGB lighting, or electronic circuits.
A mechanical keyboard is constructed differently from a membrane keyboard. Under each key, there's a separate switch, and sometimes even LED lighting and delicate components. Therefore, the goal is not just to remove visible dirt but also to prevent the intrusion of liquids and the application of force that could bend pins, break key supports, or damage stabilizers for larger keys.
Before You Clean: Disconnect, Photograph, and Check Condition
Disconnect the keyboard from the computer before doing anything. For wireless models, turn it off and remove the batteries if present. If a liquid has been spilled recently, do not connect it to the power supply to check if it's still working. First, you need to dry it and ensure no moisture remains between the switches.
It's advisable to take a photograph of the key layout on your phone before removing even one key. This saves mistakes during reassembly, especially for compact keyboards with secondary functions or non-standard layouts. In keyboards with keys in both Hebrew and English, the photo will also prevent mix-ups between similar keys.
Check the condition. Dry dust, hair, and crumbs only require light cleaning. Fingerprints and grease on the keys necessitate the removal and washing of the keycaps. Sweet, sticky, or carbonated liquids are another matter: they require quicker and more careful cleaning, and sometimes it's better to take it to a lab if the liquid has gotten inside.
How to Clean a Mechanical Keyboard for Regular Maintenance
For weekly or bi-weekly cleaning, there’s no need to remove all the keys. Turn the keyboard upside down over a clean surface, tilt it gently in various directions, and shake lightly to release crumbs. Do not bang it on the table: this could damage the keys and plastic parts.
Next, use a soft, dry brush, such as a dedicated electronics brush or a small brush with fine bristles. Brush between the rows and around the key connection areas. You can finish the process with a handheld blower or compressed air for electronics, at a reasonable distance, and in short bursts.
When using a can of compressed air, hold it upright. Spraying with the can inverted may release very cold material or moisture instead of just air. Do not press the nozzle against the switches, and do not spin the air fan inside the keyboard with excessive force. The goal is to blow the dust out, not push it deeper.
Finally, wipe the top and frame with a nearly dry microfiber cloth. If there are grease marks, you can slightly dampen a corner with water or isopropyl alcohol at an electronics-safe concentration and wring it out well. Never spray directly on the keyboard.
Deep Cleaning: Removing Keys and Washing Keycaps
If visible dirt has accumulated under the keys, it’s time for a deep clean. Use a dedicated keycap puller, preferably a wired model. It grips the keycap evenly and reduces the risk of scratching it. A plastic puller can work, but it may be less convenient with delicate keys or sensitive prints.
Pull the key straight up gently. Do not twist it forcefully and do not use a screwdriver or metallic object as a lever. For larger keys, such as spacebar, Enter, Shift, and Backspace, there are usually stabilizers. These are not complicated, but they require balanced pulling and patience to avoid bending the wire or breaking the support.
After removal, place the keycaps in a bowl of lukewarm water with a little gentle soap. Water that is too hot may warp plastic, especially in thin caps or keys made from sensitive materials. Soaking for about half an hour is usually sufficient. Then gently scrub with a soft brush, rinse with clean water, and let them dry completely on a towel.
Drying is a step that should not be rushed. The keycaps need to be completely dry, including their insides, before being returned to the keyboard. It’s best to let them air dry for several hours, or even overnight in cases of high humidity. Avoid using a hair dryer on high heat, and do not return keys while they are still cool or wet from washing.
While the keys are off, clean the keyboard base. Start with a brush and compressed air, then go around the switch housings with a cleaning stick or slightly damp cloth. Do not introduce liquid into the switch itself. If there's sticky dirt, use a minimal amount of isopropyl alcohol on a well-wrung cotton swab, and allow it to dry fully.
What Not to Do to a Mechanical Keyboard
There are shortcuts that seem effective but can turn a simple cleaning into a keyboard replacement. Avoid these actions:
- Washing the keyboard body under running water, even if the keys have already been removed.
- Spraying cleaning agents, water, fragrance, or alcohol directly between the keys.
- Using a household vacuum close to the switches. The suction power and static electricity can cause damage.
- Removing switches from keyboards that do not support hot-swapping. In such models, the switches are soldered to the board.
- Returning keys or reconnecting the keyboard before all parts are completely dry.
Even regular moist wipes are not always a good solution. They sometimes contain fragrances, oils, or excess moisture that leave a sticky residue. For cleaning computer equipment, it's better to use clean, simple materials in controlled amounts.
Spilled Liquid? Here’s How to Minimize Damage
In the case of a small amount of clean water spilled, immediately disconnect the keyboard, turn it upside down to let the liquid escape, and allow it to dry. Do not press the keys to "extract" water, and do not connect it for testing after an hour or two. Give it at least 24 hours in a ventilated place.
In cases of coffee, sweetened drinks, beer, or any sticky liquid, the risk is higher because sugar and residues remain even after the water evaporates. Remove the keycaps, gently blot the accessible liquid, and do not attempt to operate the keyboard. If it's an expensive keyboard, a wireless model with an internal battery, or one with complex lighting, taking it to a lab is a more sensible choice than risking a home dry-out.
Matching Cleaning Routine to Usage Type
An active gaming rig, a shared desktop, or an open office environment will collect dust faster than a closed workspace. Those who eat near the computer will benefit from surface cleaning once a week and a deep clean every two or three months. For relatively clean use, deep cleaning twice a year is usually sufficient.
With a keyboard featuring quality keycaps made from durable materials, cleaning is simpler, but it's still advisable to avoid aggressive substances. With cheaper keyboards that have printed labels, vigorous or prolonged scrubbing can wear down the markings. If you’re considering replacing caps, check compatibility with the keyboard layout, key height, and stabilizer placement, not just the design.
After Reassembly: Quick Function Check
Return the keys according to the photograph you took, press each one until it clicks into place, and only connect the keyboard once everything is dry. Check typing across all rows, the spacebar, Enter, Shift, arrow keys, and LED lighting. If a key feels stuck after cleaning, do not force it. Remove the cap, check for any remaining dirt or a stabilizer that isn't seated properly, and reassemble.
Proper maintenance does not require expensive equipment or unnecessary disassembly. A soft brush, keycap puller, microfiber cloth, and careful approach will keep the keyboard clean, precise, and pleasant to use - whether for work, studies, or long gaming sessions.
- How to Clean a Mechanical Keyboard Without Risking the Switches
- Xbox vs. PlayStation - Which Console is Right for You?
- Recommended Wireless Keyboards for the Office for Comfortable Work
- SSD vs NVMe: Which Drive is Right for Your Computer?
- Why Does the Computer Overheat While Gaming and How to Solve I
- 5 Akhad Ha'am St., Netanya, Israel
- Phone: +97298821001
- Sunday - Thursday: 11:00 - 24:00
Friday: 11:00 - 16:00
Saturday and holiday: 20:00 - 24:00 - Contact us form

© 2002 - 2026 TopMarket.co.il - Powered by AnyWeb.co.il